
Egg Patties
These egg patties are one of those recipes that sounds almost too simple to be worth talking about, and yet once you make them, you genuinely cannot stop. They come out soooo soft and fluffy with this custardy, silky texture that you just cannot get from scrambled eggs or a regular pan-fried egg. And the best part is you don’t have to wash a frying pan every morning because you want eggs in the morning for breakfast.
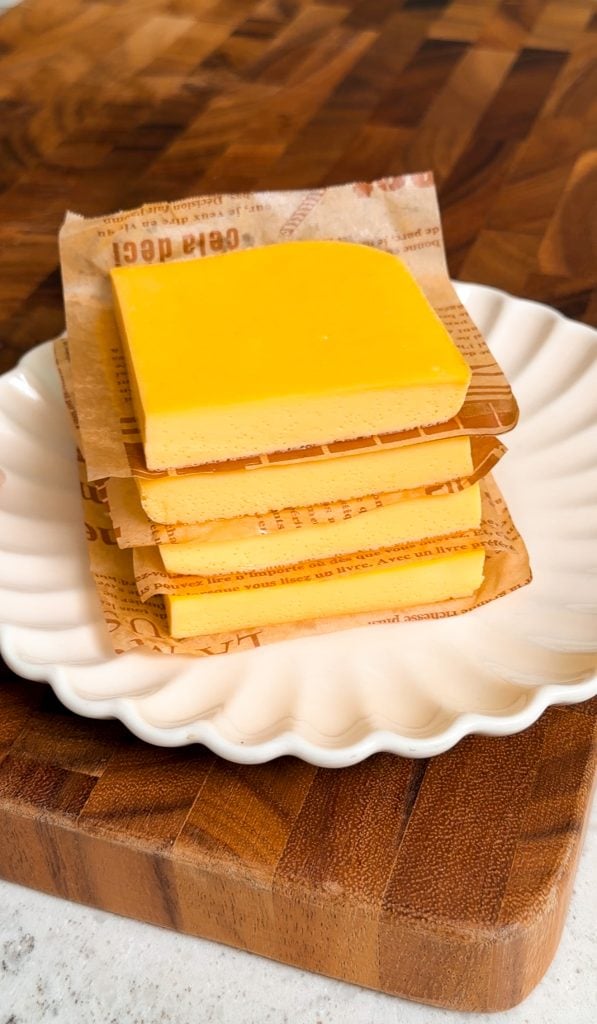
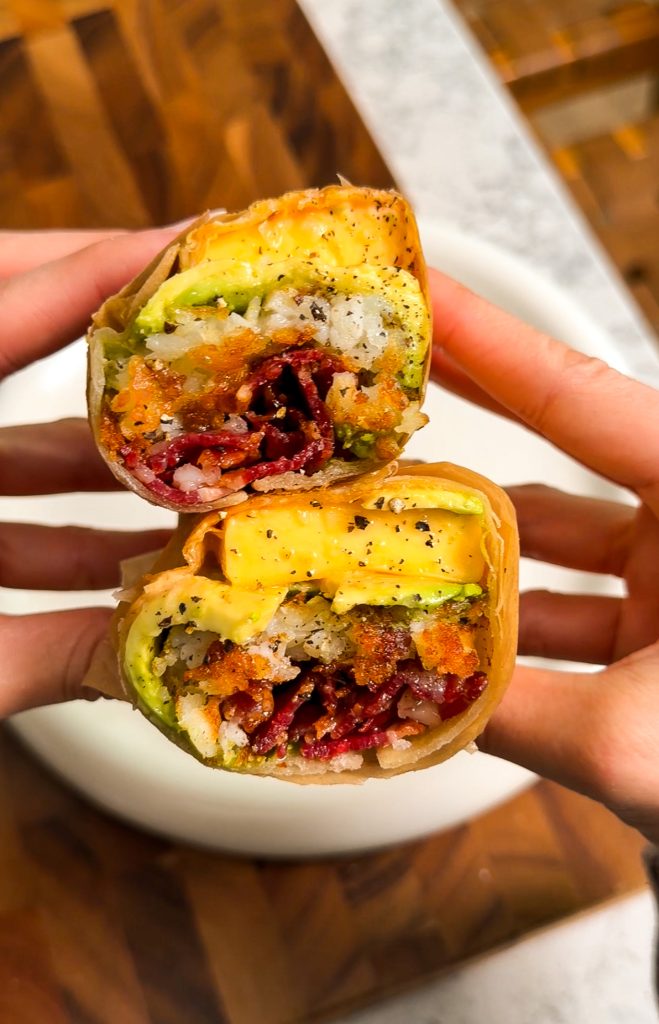
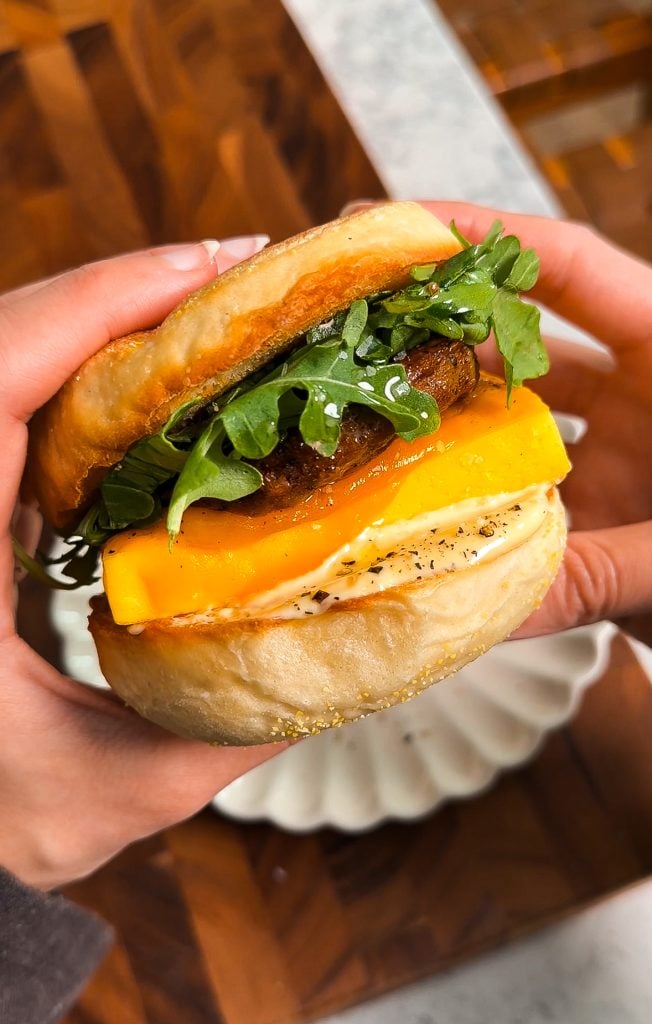
The whole concept is that you’re essentially making a baked egg custard in a square pan and then slicing it into patties. They hold their shape perfectly, they’re uniform every single time, and they fit into a breakfast sandwich like they were made for it. I also love putting them in breakfast tacos and burritos. Ever since doing this once, it’s become a weekly routine in our house to make a batch of them!
What you’ll need
The ingredient list here is genuinely short: eggs, whole milk, a little heavy cream, and salt. That’s it. The heavy cream adds a nice extra richness and creaminess to the texture, but it’s completely optional — you can just swap it for more whole milk and they’ll still come out great. Or even half and half! The whole milk adds just enough fat to keep things custardy without making the mixture too heavy to set properly.
On equipment, you’ll need an 8×8 or 9×9 baking pan and a larger 9×13 pan to create the water bath. A fine mesh sieve and an immersion blender are both optional but genuinely worth using if you want the smoothest possible result.
How to actually make them
Preheat your oven to 300°F before you do anything else because the process is super quick. Whisk your eggs, milk, and salt together until the mixture is completely smooth, or blend it with an immersion blender if you want to go the extra mile. After blending, I then add the heavy cream in and give it a whisk. Then it’s time to strain! Straining through a fine mesh sieve is another optional step that removes any bubbles and gives you that perfectly uniform, silky texture.
Let the mixture sit for about 10 minutes after mixing. This sounds like an unnecessary step but it isn’t. It lets any remaining air bubbles rise to the surface so they’re not trapped in the finished eggs. Pour into your greased pan, tap it on the counter a few times to release any large bubbles, then set it inside the larger 9×13 pan and pour hot water in until it reaches halfway up the sides of the smaller pan.
A few things to keep in mind:
- Tent the pan with foil before it goes in — this keeps the top from browning and the eggs from drying out
- Visual cues matter more than the timer since every oven runs differently. Press the center gently — firm means done, jiggly means it needs more time
- Let it cool slightly before flipping onto a cutting board. Don’t rush this part or it’ll fall apart on you
- Use an 8×8 pan for thicker patties. Use a 9×9 pan (the size I used) for slightly thinner patties
To know when they’re done, press the center gently with your finger. It should feel completely firm and spring back slightly with no jiggle at all. Every oven runs a little differently so go by feel more than the clock. If there’s any wobble in the center, give it a few more minutes. You’re looking for fully set all the way through, not just around the edges.
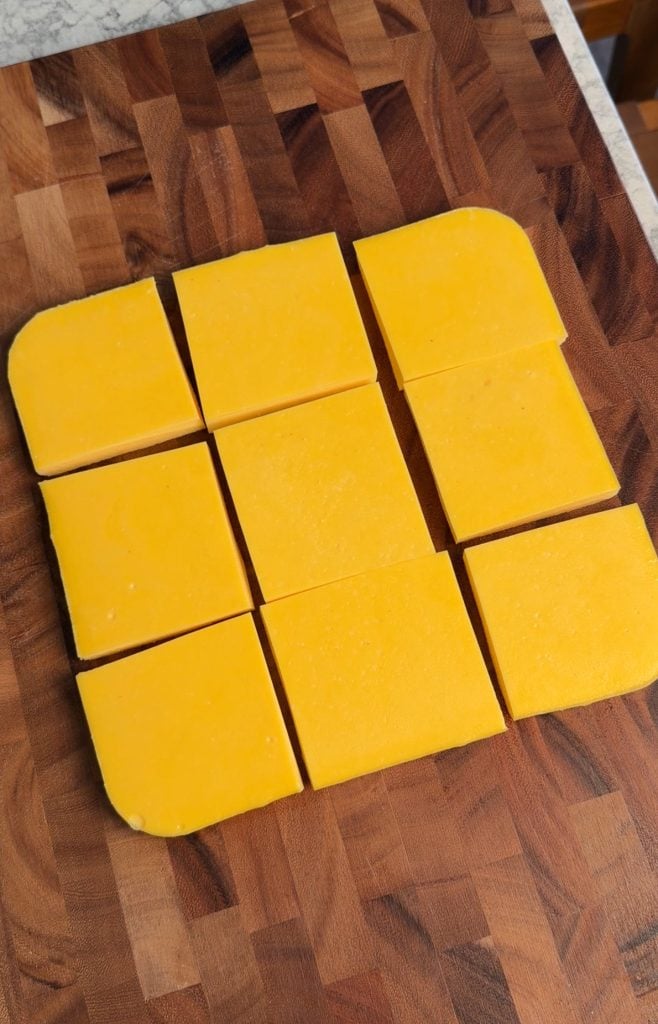
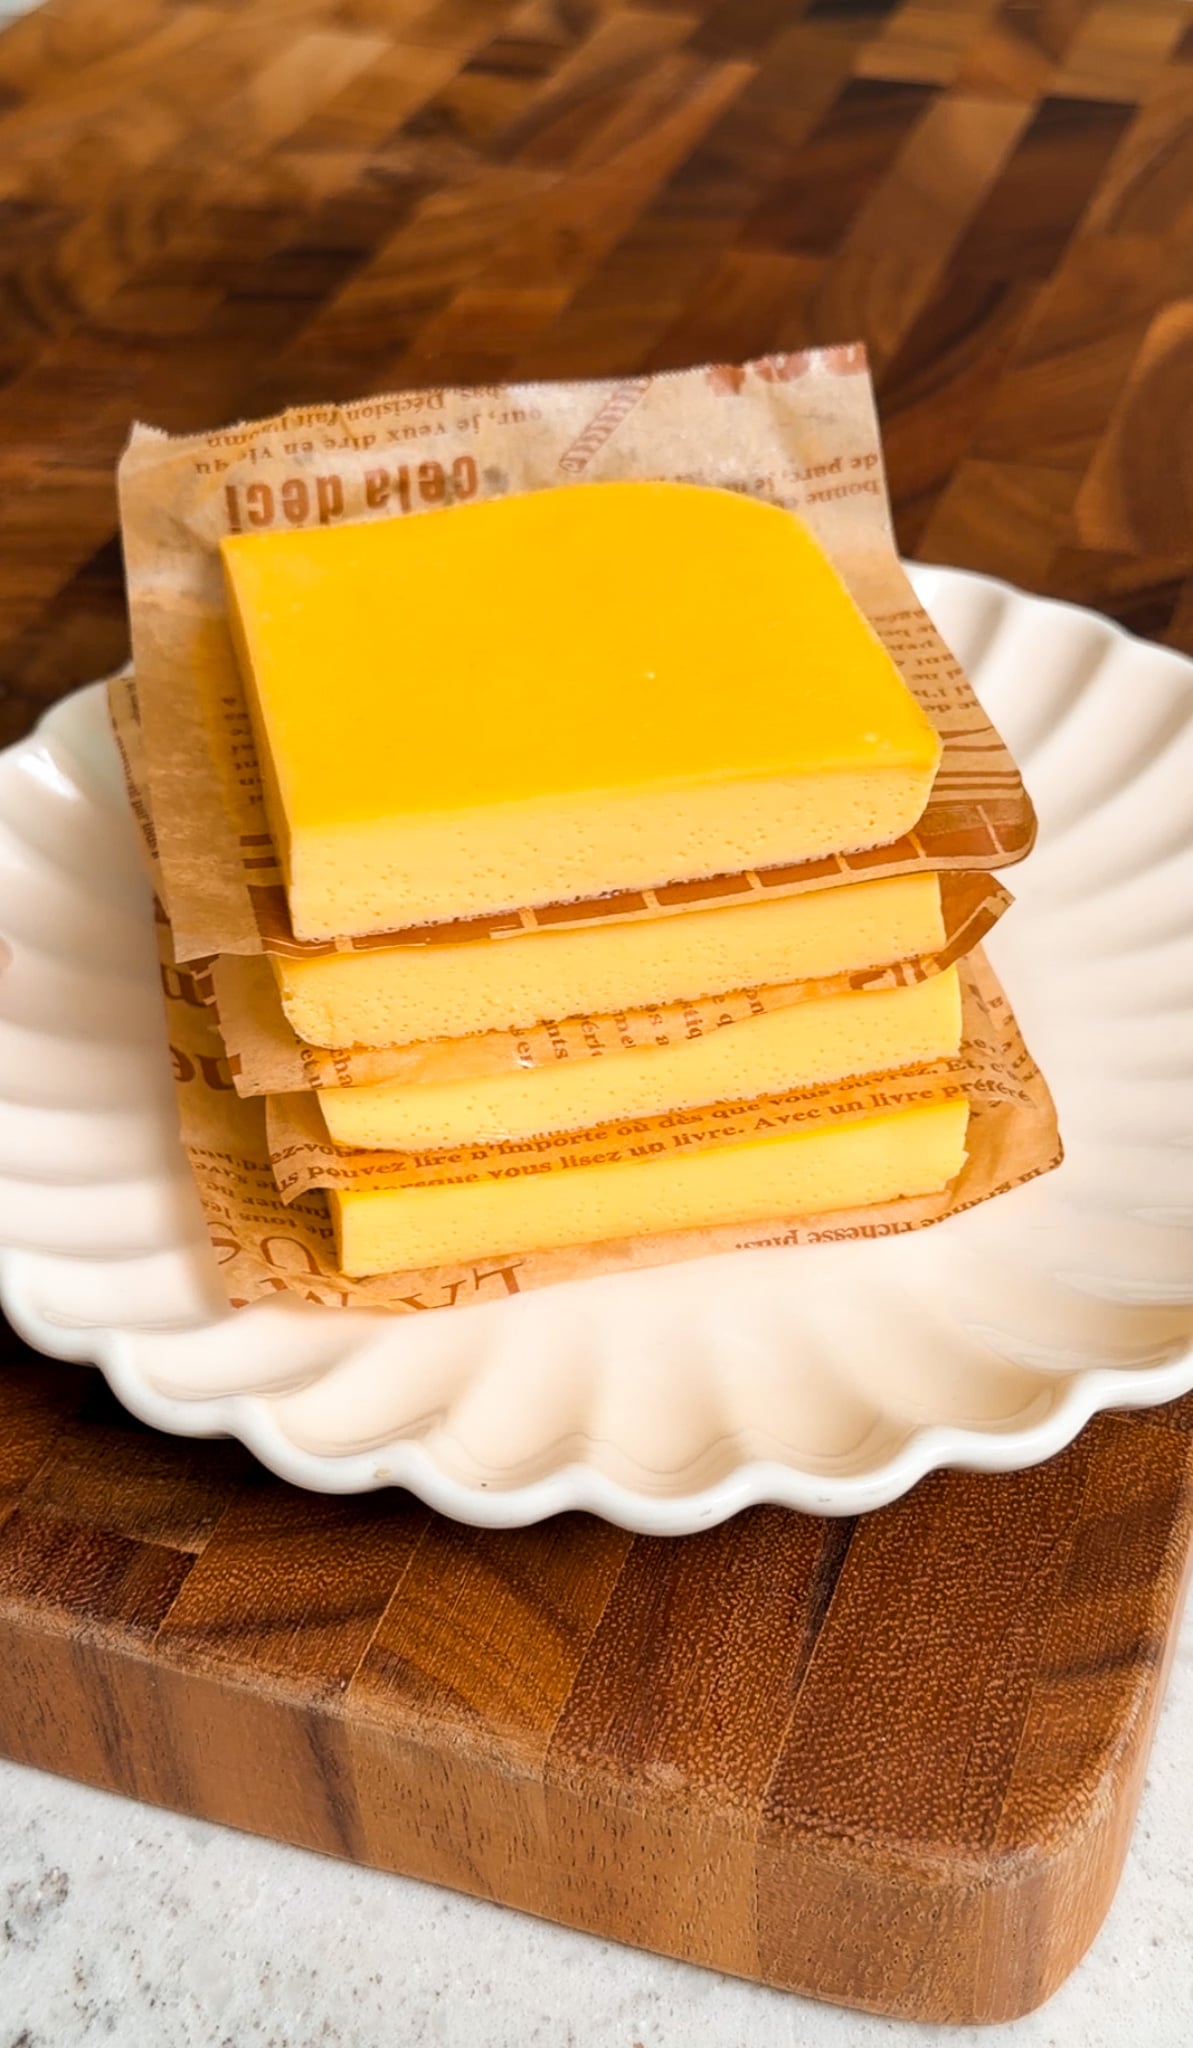
Once it’s flipped and cooled, slice into 9 even patties. After they’ve cooled, stack them with parchment squares in between so they don’t stick to each other.
Tips and tricks
Don’t skip the rest time. Letting the egg mixture sit for 10 minutes before baking is a small thing that makes a real difference in the final texture. You’ll get fewer bubbles and a cleaner result.
Use an immersion blender if you have one. It takes 20 seconds and gets the mixture smoother than whisking alone. Smoother mixture equals better texture.
Strain if you want perfection. It’s optional but it makes the mixture extra smooth and it breaks up a lot of the bubbles!
Press lightly to test doneness. The center should feel firm and spring back slightly. If it jiggles at all, give it another few minutes. Underdone is the only real way to mess this up.
Variations worth trying
The base recipe is essentially a blank canvas. Some combinations that work really well:
- Cheesy — stir in shredded cheddar, gruyère, or pepper jack before pouring into the pan
- Veggie — add finely chopped sautéed spinach, onion, or roasted red pepper
- Loaded — mix in crumbled cooked turkey sausage or finely chopped beef bacon
- Herb — a little fresh chive or dill stirred in makes these feel way more elevated for basically no effort
- Spicy — a pinch of cayenne or some finely minced jalapeño in the egg mixture
The egg and dairy ratio stays the same regardless of what you add. Keep that constant and everything else is up to you.
Make-ahead and storage
This is genuinely one of the best meal prep recipes out there for breakfast. Bake them fully, let them cool completely, and store in an airtight container in the fridge with parchment squares between each layer. They keep well for up to 4 to 5 days and reheat quickly — 30 to 60 seconds in the microwave is usually enough.
Having a batch of these ready means you’re one English muffin and 60 seconds away from a really good breakfast sandwich on any given morning. Make them once, eat well all week.
Craving more breakfast? Try these recipes out
- Freezer Breakfast Sandwiches: A homemade version of the classic sausage and egg McMuffin that’s fully meal-prepped and freezer-friendly. Morning chaos solved.
- Sheet Pan Egg Bake: A big, flavor-packed egg bake loaded with sun-dried tomatoes, feta, and spinach, all done in one pan in under 30 minutes. Great for feeding a crowd or getting ahead for the week.
- Croissant Freezer Breakfast Sandwiches: Smoked beef bacon and gouda on a buttery croissant roll, made ahead and frozen so breakfast is literally one minute away.
- Croque Monsieur Breakfast Croissants: The iconic French sandwich turned breakfast. Creamy béchamel, fluffy eggs, gruyère, and turkey ham stuffed into a golden croissant. Indulgent in the best way.
- Starbucks Copycat Feta Egg White Wrap: Light, high-protein, and packed with flavor from sun-dried tomatoes and feta. Better than the original because it’s homemade and ready to grab and go all week.
If you make this recipe, make sure to leave a comment below and let me know how it turns out — I love hearing from you! And if you snap a photo, don’t forget to tag me over on Instagram or TikTok so I can see your creations too.
You can also find this recipe and so many more on my Pinterest — perfect for saving to your board for later. And if you’re more of a visual learner, check out my YouTube channel, where I walk you through recipes step-by-step just like this one.
Breakfast
Egg Patties – Meal Prep
Ingredients
- 10 large eggs
- 1/2 cup whole milk
- 1 teaspoon salt
- 2 tablespoons heavy cream
Instructions
- Preheat the oven to 300°F and lightly grease an 8x8 or 9x9 baking pan.
- In a bowl, whisk together the eggs, milk, and salt until fully combined and smooth, or use an immersion blender for an extra smooth mixture.
- Then add in the heavy cream and whisk by hand.
- Optional: strain the mixture through a fine mesh sieve to remove bubbles and ensure a super silky texture.
- Let the mixture sit for about 10 minutes to allow any remaining bubbles to rise to the surface.
- Pour the mixture into the prepared baking pan and gently tap or bang the pan on the counter to release any large air bubbles.
- Place the filled pan inside a larger 9x13 baking dish and carefully pour hot water into the larger dish until it comes about halfway up the sides of the smaller pan.
- Lightly tent the pan with a piece of foil and transfer to the oven.
- Bake for about 25 minutes, or until the eggs are set and the center feels firm, not jiggly.
- Remove from the water bath and let cool slightly, then carefully flip the eggs over onto a cutting board.
- Slice into 9 even patties.
- Stack the egg patties with parchment paper squares in between each layer and store in an airtight container in the fridge.
Tips & Notes
Q: Why use a water bath?
A: It gently cooks the eggs and prevents them from becoming rubbery, giving you that soft, custardy texture.
Q: Do I have to strain the eggs?
A: No, it’s optional, but it gives you a smoother, more uniform texture and removes bubbles.
Q: Why tent with foil?
A: It prevents the top from browning and keeps the eggs soft and evenly cooked.
Q: How do I know they’re done?
A: Visual cues are best since every oven is different. The center should look set and feel firm when you press lightly, with no jiggle.
Q: Can I add fillings?
A: Yes! You can mix in cooked veggies, cheese, or cooked beef/turkey bacon or sausage.
Q: How long do they last?
A: They keep well in the fridge for up to 4 days and reheat easily.
You Might Also Like




WHAT DO YOU THINK OF THIS RECIPE?

HI, I’M HAJAR
Welcome to Moribyan! This is my blog where I love to share all my favorite recipes and lifestyle tips with you all. If I’m not cooking here, I’m either at Trader Joe’s, the gym, or eating a bagel.
LET’S CONNECT
Pin This Recipe



So good! My toddler loves these!
I literally LOVE all your recipes and this one is just as amazing. The cook time was closer to an hr for me but I dont mind and are making them again this week 😊 IM LITERALLY SUCH A FAN OF YOUR COOKING YOU HAVE A GIFT KEEP UP THE GOOD WORK QUEENNN !!
These turned out great. I added a little shredded gouda and a few bacon bits. My only issue is it took over an hour to cook but they still ended up with a great texture. Will definitely be making these again.