
Kimchi
Making kimchi at home is the best way to bring the vibrant flavors of Korean cuisine to your table. This tangy and spicy dish is delicious and packed with probiotics, making it great for your gut health. It’s a simple, satisfying way to enjoy a classic Korean favorite and it makes everything taste better from rice bowls to noodles and barbecue!

Ingredients and Preparation
To start, you’ll need a head of napa cabbage, which forms the base of your kimchi. Begin by cutting the cabbage into quarters, removing the core, and slicing it into smaller, bite-sized pieces. Rinse it really well to remove any dirt or bugs that may have gotten into the cabbage. Then toss the cabbage with a generous amount of coarse salt. Make sure to massage it into every piece, cover it with water, place a heavy plate on top to press it down, and let it sit for about 1-2 hours. This process helps to soften the cabbage and draw out excess moisture, which is crucial for the right texture in your finished kimchi. After it’s softened, rinse the cabbage thoroughly under cold water to remove the salt, and then drain it well.
While your cabbage is softening, you can prepare the kimchi paste, which is where all the magic happens. Start by making a rice flour paste, combining sweet rice flour with water, and cooking it in a pot over medium heat until it thickens. Allow this paste to cool, as it will be mixed with other flavorful ingredients. For the kimchi paste itself, blend a quarter to a third of a yellow onion with several garlic cloves and a small piece of ginger until smooth.
Once your rice flour paste is cooled, mix it with the garlic, onion, and ginger paste. To this mixture, add white sugar, fish sauce, and gochugaru (Korean red pepper flakes) to taste. The amount of gochugaru will determine how spicy your kimchi is, so adjust according to your preference. A bit of salt is added for seasoning, rounding out the flavors. Now for the veggies — to your bowl with the prepared napa cabbage, add sliced green onions and julienned Korean radish.


Next, combine the kimchi paste with your veggies. Using your hands (gloves are highly recommended to avoid staining your skin), massage the paste into the cabbage until every piece is thoroughly coated. This step is crucial as it ensures that the flavors penetrate every part of the cabbage.
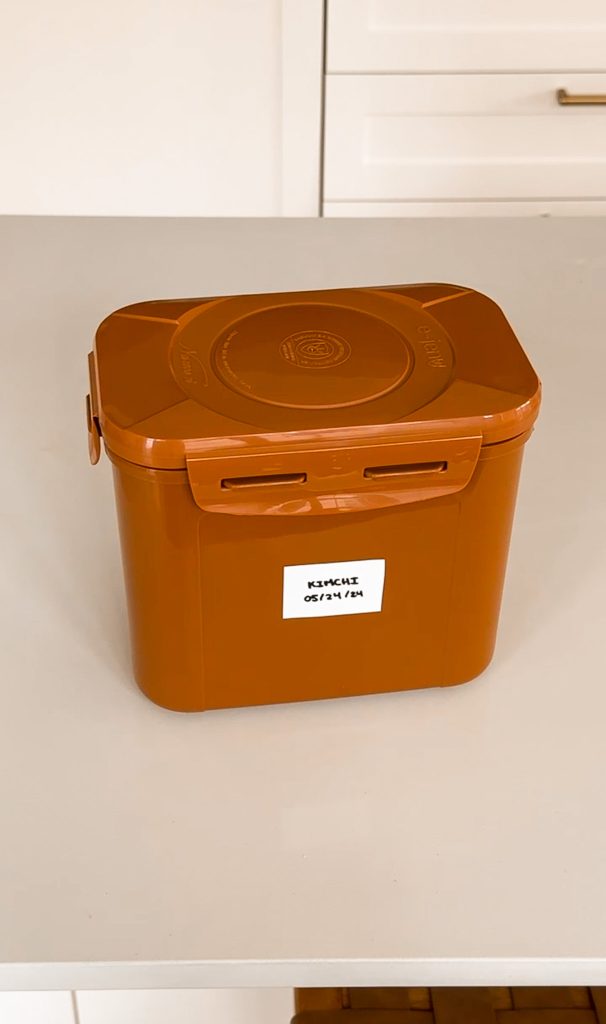
Transfer the mixture into a clean jar or airtight container, packing it tightly to eliminate air pockets. Leave some space at the top of the jar to accommodate the kimchi’s expansion as it ferments. Seal the jar and let it sit at room temperature for about 1-2 days. The fermentation time will vary depending on your room temperature and how tangy you like your kimchi. I like it only a bit tangy so I leave it out overnight and then pop it in the fridge. Once it’s fermented to your liking, move the jar to the refrigerator to slow down the fermentation process.
Tools You’ll Need
To make kimchi, you’ll need a few essential tools. A large mixing bowl is crucial for combining the cabbage and paste. A small pot will be used for cooking the rice flour paste. A blender or food processor is necessary for making the kimchi paste, and gloves are highly recommended to protect your hands from the spicy gochugaru. Finally, you’ll need a clean jar or airtight container to store the kimchi during fermentation.
LINKS:
Variations
Feel free to experiment with different vegetables in your kimchi. If you enjoy a sweeter kimchi, you might add a bit of shredded carrots, apple, or pear to the paste. For extra heat, incorporate chili paste like gochujang along with the gochugaru. You could also add dried squid, dried shrimp, oyster sauce, or even dried mushrooms for an umami taste.
You can also leave the cabbage whole and chop it after fermenting which is a very common kimchi preparation.
Storing Kimchi and How Long It Lasts
Kimchi can last for several weeks to a few months in the refrigerator. As it continues to ferment, it will develop a stronger flavor. Always use clean utensils to scoop out portions to avoid introducing contaminants. If you notice any off smells or mold, it’s best to discard it. Properly stored, your homemade kimchi will be a delicious and probiotic-rich addition to your meals for weeks to come.
Where to Get Ingredients
Most ingredients for kimchi, including gochugaru, sweet rice flour, and fish sauce, can be found at Asian or Korean grocery stores. If you don’t have access to a local store, many specialty ingredients are available online through retailers or dedicated Asian market websites.

Craving More Korean Food? Try These Recipes Out!
If you tried this recipe and loved it, drop by down below and let me know how you liked it with a rating and comment! Feel free to also leave a question there about this recipe and I’ll get right back to it.
To see more recipes and behind-the-scenes, follow along on Instagram and Youtube! I’m also now on Pinterest pinning away so stop by and see what’s up.

Side Dish
Kimchi
Ingredients
CABBAGE- 1 head of napa cabbage
- 1/3 cup coarse salt
- 1/2 cup sweet rice flour
- 2 cups water
- 1/4 to 1/3 whole yellow onion
- 8 to 10 garlic cloves
- 1/2 to 1 inch of ginger
- 1/4 cup white sugar
- 1/4 cup fish sauce
- 3 to 5 green onions, chopped
- 1 cup daikon radish, thinly chopped
- 1/2 to 3/4 cup gochugaru (Korean red pepper flakes)
- 3/4 teaspoon salt, adjust to taste
Instructions
- Prepare the Cabbage: Start by cutting your napa cabbage into quarters, removing the core, and then cutting the quarters into smaller bite-sized pieces. Rinse and clean the cabbage well to remove any dirt.
- Place the cabbage in a large bowl and generously sprinkle coarse salt over it, massaging it well into every piece. Cover with water and place a heavy plate on top to press down. Let the cabbage sit for a while, 1 to 2 hours, until it softens and releases some of its moisture.
- Rinse and Drain: Once the cabbage has softened, rinse it thoroughly under cold water to remove the excess salt. Let it drain well, pressing out any excess water.
- Make the Kimchi Paste: In a small pot, combine sweet rice flour with water, stirring until smooth. Cook the mixture over medium heat, stirring constantly, until it thickens into a paste. Remove from heat and let it cool.
- Prepare the Aromatics: In a blender or food processor, combine a chunk of yellow onion, garlic cloves, and a small piece of ginger. Blend until smooth.
- Mix the Kimchi Paste: Once the rice flour paste has cooled, combine it with the blended aromatics, sugar, fish sauce, and gochugaru in a large mixing bowl. Season the paste with a bit of salt, adjusting to taste.
- Combine with Cabbage: Add the drained cabbage to the bowl with the kimchi paste along with the green onions and radish. Using your hands (wearing gloves if preferred), massage the paste into the cabbage, ensuring every piece is thoroughly coated.
- Pack and Ferment: Once the cabbage is well-coated, pack it tightly into a clean jar or airtight container. Press down to remove any air pockets. Leave some space at the top as the kimchi will expand during fermentation. Seal the jar and leave it at room temperature for a day or two, depending on how tangy you like your kimchi. Then, transfer it to the fridge to slow down the fermentation process.
- Enjoy: Your kimchi can be enjoyed right away, but it develops deeper flavors after a few days in the fridge. Serve it as a side dish or add it into any of your favorite dishes.
You Might Also Like




WHAT DO YOU THINK OF THIS RECIPE?

HI, I’M HAJAR
Welcome to Moribyan! This is my blog where I love to share all my favorite recipes and lifestyle tips with you all. If I’m not cooking here, I’m either at Trader Joe’s, the gym, or eating a bagel.
LET’S CONNECT
Pin This Recipe




I love that the recipe gives you the perfect amount of kimchi for 1-2 people and it’s so easy to make too. Love it!