
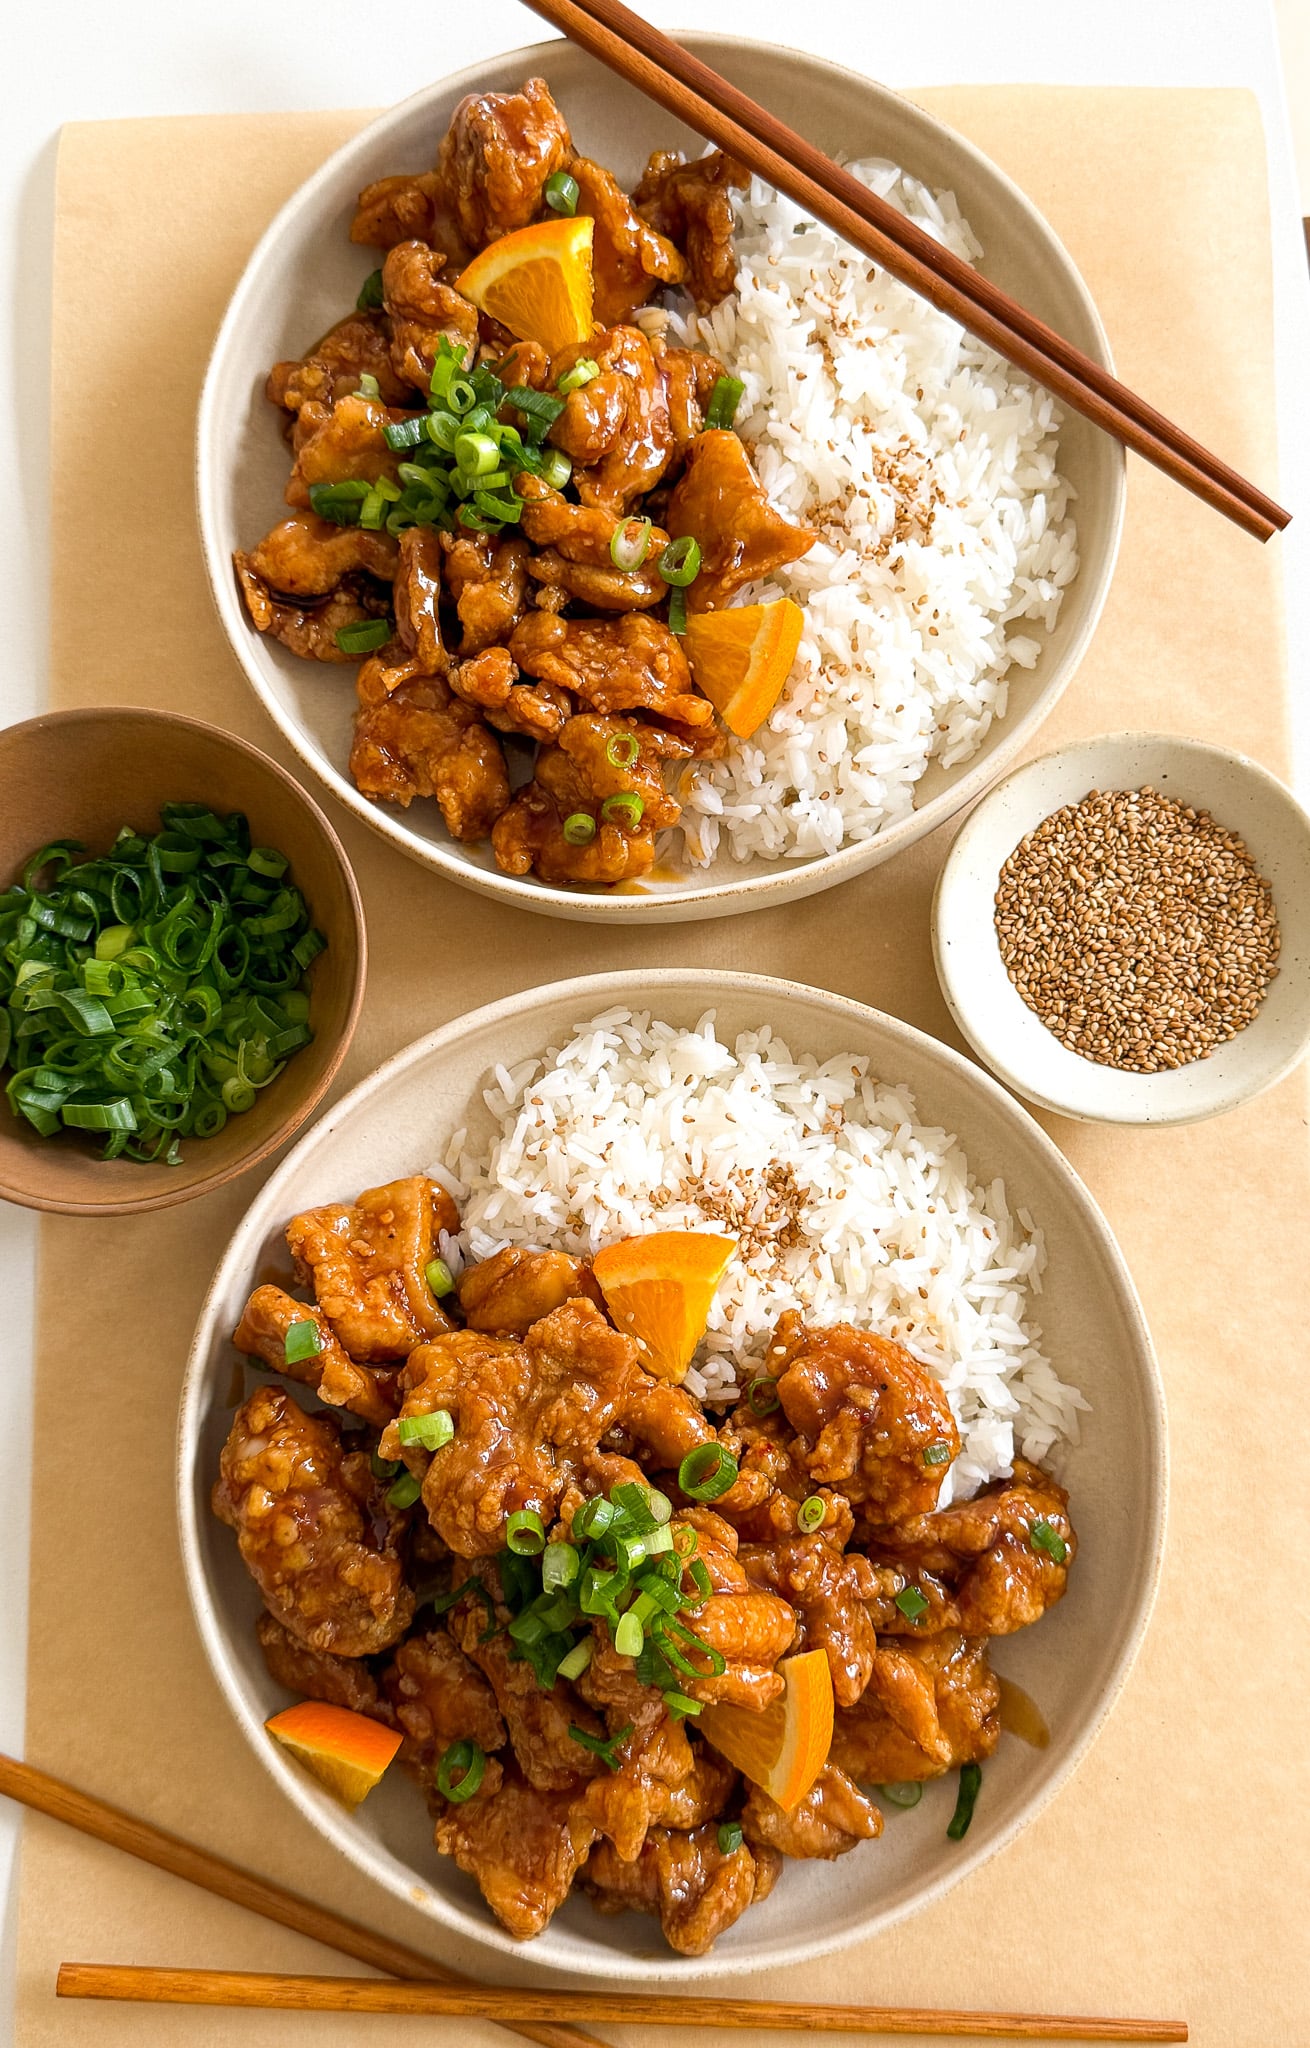
Gluten-Free Orange Chicken
There’s something about orange chicken that just hits different. It’s crispy, sticky, tangy, and sweet all at once—and when you get that perfect bite with just the right amount of sauce? Game over. But if you’re gluten-free or cooking for someone who is, takeout can feel like a no-go. That’s why I had to make my own copycat Panda Express orange chicken—but gluten-free, and honestly… you can’t tell the difference. Confirmed by non gluten-free eaters!
Why This Orange Chicken is So Special
To keep this recipe totally gluten-free without sacrificing flavor or texture, I use King Arthur’s 1:1 gluten-free flour. It’s hands-down my favorite for frying because it gives that perfect golden crunch. And instead of traditional soy sauce, which contains wheat, I use coconut aminos. Not only is it gluten-free, but it also adds a subtle natural sweetness that works so well with the tangy orange glaze.
Making the Perfect Orange Glaze
Let’s start with the glaze because that’s the magic of this dish. In a saucepan, combine coconut aminos, orange juice, rice vinegar, brown sugar, sesame oil, minced garlic, ginger paste, and red pepper flakes. Let it come to a simmer on medium heat until everything is fragrant and the sugar has dissolved. Reduce the heat to low. In a small bowl, whisk together a little water and cornstarch, then pour this mixture into the saucepan while stirring. It’ll thicken up and become a glossy, sticky sauce that’s perfect for coating those crispy chicken pieces. Once it’s ready, turn off the heat and set it aside.
The Secret Hack: Breading Chicken Faster
Now, let’s talk chicken. I prefer boneless, skinless chicken thighs because they stay juicy inside even after frying, but you can use breast meat if you prefer. Cut the thighs into bite-sized pieces. Here’s my secret hack for breading: first, combine the gluten-free flour, cornstarch, salt, and black pepper in a large Ziploc bag and shake it to mix everything together. Then, dip the chicken pieces into a bowl with beaten eggs, ensuring they’re fully coated. Once coated in egg, throw the chicken pieces into the Ziploc bag with the dry ingredients and shake it all around. This method is not only faster but also keeps things tidy, making sure every piece gets that perfect, crispy breading.
Frying the Chicken
Next up: frying! Heat up some vegetable oil in a pot over medium heat until it hits about 350°F. To test if the oil is ready, drop in a little bit of flour—it should sizzle immediately. Fry the chicken in batches, making sure not to overcrowd the pot. Each batch should take about 5 to 6 minutes to turn golden brown and crispy on the outside while staying perfectly cooked inside. Once the chicken’s done, transfer it to a wire rack or paper towel-lined plate to drain any excess oil.
Tossing in the Glaze
The moment you’ve been waiting for: tossing the hot, crispy chicken in that beautiful, sticky orange glaze. You want every piece to be coated and glistening, like it just came out of your favorite takeout spot—but better because you made it yourself. I just add the fried chicken pieces into a large bowl, pour in the warm orange sauce, and toss it all together gently. If you’re feeling extra, garnish with some green onions and sesame seeds for a little extra flair. Serve it over jasmine rice to enjoy!
Craving More Copycats? Try These Recipes Out!
- Taco Bell Crunchwrap Supreme
- McDonald’s McChicken
- Olive Garden Chicken Gnocchi Soup
- Magnolia Bakery Banana Pudding
- Cava Spicy Lamb Meatballs
If you tried this recipe and loved it, drop by down below and let me know how you liked it with a rating and comment! Feel free to also leave a question there about this recipe and I’ll get right back to it.
To see more recipes and behind the scenes, follow along on Instagram and Youtube! I’m also now on Pinterest pinning away so stop by and see what’s up.
Main Course | Restaurant Remakes
Gluten-Free Orange Chicken
Ingredients
CHICKEN- 1 1/2 pounds chicken thighs, boneless and skinless
- 1/2 cup gluten-free flour
- 1 cup cornstarch
- 1 teaspoon salt
- 1/2 teaspoon black pepper
- 2 large eggs
- 1/2 teaspoon salt
- 1/2 teaspoon black pepper
- 1/4 cup coconut aminos
- 1/3 cup orange juice
- 1/3 cup rice vinegar
- 1 cup brown sugar
- 1/2 tablespoon sesame oil
- 2 teaspoons minced garlic
- 1 teaspoon ginger paste
- 1 teaspoon red pepper flakes
- 1/4 cup water + 3 tablespoons cornstarch
- vegetable oil, for frying
- green onions and sesame seeds, optional garnish
Instructions
MAKE THE ORANGE GLAZE
- Start by making the orange glaze. In a saucepan, combine the coconut aminos, orange juice, rice vinegar, brown sugar, sesame oil, garlic, ginger paste, and red pepper flakes. Bring it to a gentle boil over medium heat. Then reduce the heat to low.
- In a small bowl, whisk together the water and cornstarch until smooth. then slowly pour it into the bubbling sauce while stirring.
- Let it simmer for a few minutes until thick, glossy, and coats the back of a spoon. Turn off the heat and set it aside while you fry the chicken.
BREADING & FRYING THE CHICKEN
- Cut the boneless, skinless thighs into bite-sized pieces.
- In a large Ziploc bag, add the gluten-free flour, cornstarch, salt, and black pepper. Seal the bag and shake it to mix everything together.
- In a bowl, beat the eggs and season with salt and pepper. Dip all the chicken pieces into the egg mixture, then transfer them straight into the Ziploc bag.
- Seal it up and shake it all around until every piece is fully coated.
- Heat a pot of vegetable oil over medium heat until it reaches 350°F. Fry the chicken in batches, making sure not to overcrowd the pot. Cook each batch for about 5 to 6 minutes until golden, crispy, and fully cooked through. Transfer to a wire rack or paper towel-lined plate to drain.
- Once all the chicken is done, toss it in the warm orange glaze until each piece is coated and glistening.
- Sprinkle with sliced green onions and sesame seeds if you want, then dig in while it’s hot and crispy!
You Might Also Like


WHAT DO YOU THINK OF THIS RECIPE?

HI, I’M HAJAR
Welcome to Moribyan! This is my blog where I love to share all my favorite recipes and lifestyle tips with you all. If I’m not cooking here, I’m either at Trader Joe’s, the gym, or eating a bagel.
LET’S CONNECT
Pin This Recipe

This was so good!! I haven’t been able to have too much Asian takeout food after developing a severe wheat allergy, and this was such the perfect replacement! It was also a huge hit among the non-gluten-free folks in my household. I even enjoyed the leftovers a few hours later and the texture was still great.
I’m not a huge fan of frying food but this is worth the effort. I can’t wait to make it again!
The only replacement that I made was using corn oil instead of vegetable to keep it soy-free.
I made this recipe for my husband and he loved it! I used chicken breasts and thighs and preferred the breasts. I would make it again on the condition that Hajar herself comes and cleans up my kitchen after bc omg did i make a mess with this recipe 🙂